Pricing starts at $200 for a repair
Restoring a vintage car’s interior is where passion meets precision. The authentic cabin is what really takes you back in time, even though the shiny exterior might draw attention at car shows. Whether you’ve inherited your grandfather’s 1965 Mustang or scored a barn-find ’57 Chevy, bringing the interior back to its former glory takes planning. It requires the right knowledge, materials, and techniques.
This comprehensive guide walks you through every aspect of vintage car interior restoration. You’ll learn how to assess damage and select period-correct materials. This helps preserve automotive history while honoring the original craftsmanship in the driving experience.
What is Vintage Car Interior Restoration?
Vintage car interior restoration is more than cleaning or minor repairs. It’s the careful process of returning a classic vehicle’s cabin to its original condition while preserving historical accuracy and ensuring comfort for modern use.
The work typically covers seats, door panels, headliners, carpeting, dashboard components, and interior trim. Unlike modern vehicles with standardized synthetic materials, vintage cars use model-specific fabrics, genuine leather, chrome accents, and wood trim, all of which require specialized restoration techniques.
The central challenge is balancing authenticity with durability. Materials must replicate the look and feel of period-correct originals while withstanding regular use far better than components that are 50 years old. The growing automotive restoration market, valued at USD 12.8 billion in 2024 and projected to reach USD 19.7 billion by 2034 at a CAGR of 4.4%, reflects both the complexity of this work and the premium collectors place on authentic interiors.
Where to Start
Before ordering materials or picking up tools, conduct a thorough assessment of your vintage car’s interior condition. This evaluation determines whether you need a complete restoration, selective repairs, or primarily cosmetic improvements.
Create a Comprehensive Assessment Checklist
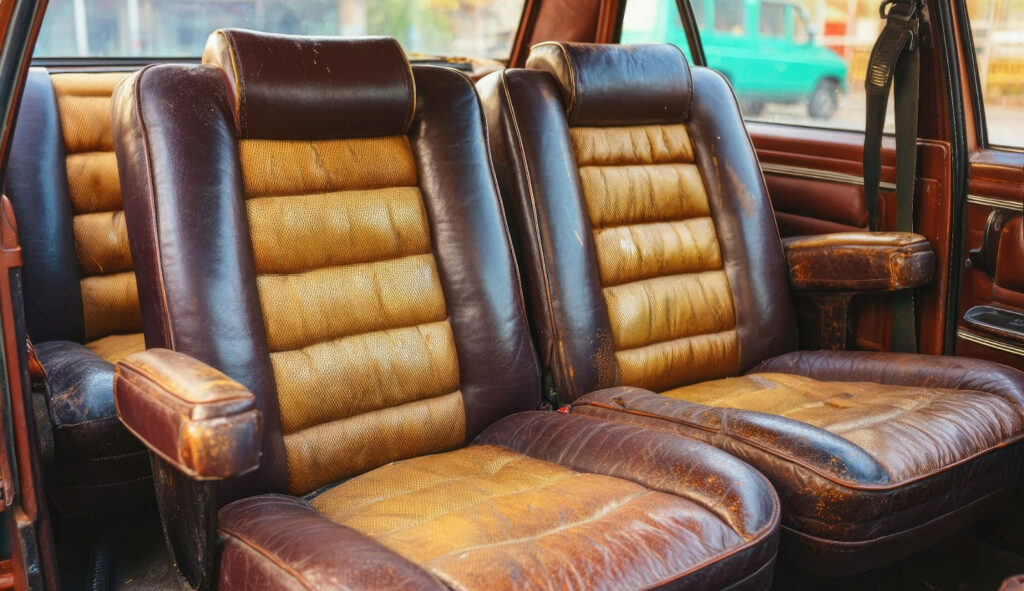
- Seats: Check for torn upholstery, broken springs, compressed foam, rusted frames, seam separation, and water damage.
- Door Panels: Inspect for warping, loose mounting, and damaged armrests or window cranks.
- Headliner: Look for sagging, stains, or detachment from the roof.
- Floorboards: Pull back carpeting to check for rust or rot.
- Trim & Dashboard: Catalogue all trim, dashboard components, center console, window trim, and kick panels, noting missing pieces for sourcing rare reproductions.
Document Everything Photographically
Take wide shots and close-ups of damage from multiple angles. These photos become invaluable reference materials during restoration and help verify color matching when ordering materials.
How to Reupholster a Car Interior
Learning how to reupholster a car interior successfully requires patience, proper tools, and attention to detail.
1. Create Accurate Patterns First
Begin by carefully removing the existing upholstery, photographing each step to guide reassembly. Original patterns may be hidden beneath the top layer. If they aren’t intact, create new ones by tracing the old pieces onto butcher or pattern paper, adding seam allowances, and marking directional arrows for nap or grain.
For complex curves, make muslin mock-ups to test the fit before cutting final materials, ensuring adjustments can be made without wasting leather or vintage-style fabric.
2. Source Period-Correct Materials
Authenticity is essential in vintage car interior restoration. Use door tags, build sheets, or owner documentation to verify the original materials, colors, and patterns for your car’s make, model, and year.
Common vintage materials by era:
- 1950s: Luxury models used genuine leather; standard trims featured vinyl or cloth. Sedans often had broadcloth, while convertibles favored vinyl for weather resistance.
- 1960s: Expanded vinyl options with bright colors and creative patterns. Muscle cars showcased houndstooth or custom pleated designs. Genuine leather is mostly limited to premium European imports.
- 1970s: Synthetic materials became dominant. Velour was popular in luxury and personal luxury coupes, while vinyl remained standard in base models.
3. Rebuild Seat Foundations Properly
Thoroughly assess seat frames before reupholstery. Strip them to bare metal, treat any rust, and apply rust-preventive primer and paint. Repair or replace broken springs, which may include zig-zag or coil types that sometimes need professional rebuilding.
Replace seat foam with appropriate-density materials. Original open-cell foam often deteriorates, while modern closed-cell foam lasts longer. Using closed-cell foam with similar density preserves comfort and authenticity.
Some restorers use original-style materials like jute padding and horsehair for maximum authenticity, though it requires particular skills.
4. Install Upholstery Methodically
Work methodically from one section to another, starting with the most visible surfaces and moving to less prominent areas. For seat bottoms, center the material and work outward, pulling firmly but not too tight.
Use the correct fastening method for each part: hog rings for springs, listing wire for panels, and adhesive spray for backing boards. Proper technique prevents wrinkles, puckers, or premature failure.
Pay close attention to seam alignment. Straight, evenly spaced seams create a professional finish. Use a walking foot sewing machine for heavy materials, and match needle size to material thickness.
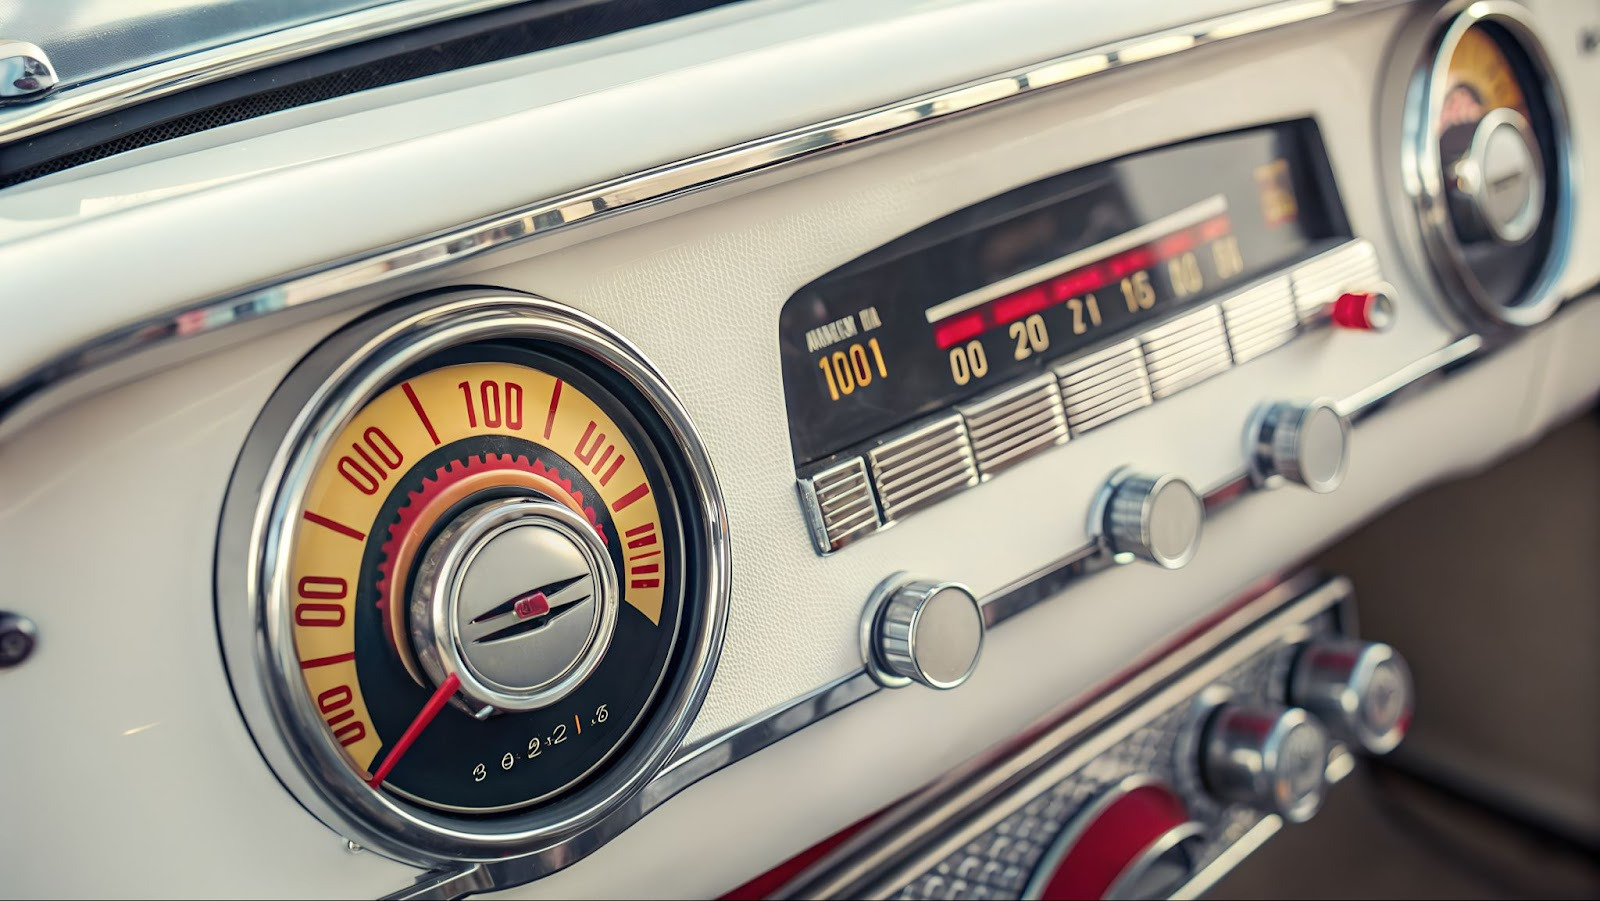
5. Restore Dashboards and Door Panels
Dashboard restoration requires different techniques depending on the material. Painted metal dashboards may need media blasting and repainting. Padded dashboards with vinyl covering often hide degraded foam underneath.
For vinyl dashboard covers, carefully remove the old material, repair or replace the padding, then install new vinyl using heat to stretch around curves and contact adhesive to secure edges.
Door panels with cardboard backing typically need complete replacement of the substrate if water-damaged. Create new backing from tempered hardboard, then wrap with period-correct vinyl or fabric. Reattach original chrome trim pieces or source reproduction items.
Essential Tools and Materials
Proper tools make the difference between frustration and success in vintage car interior restoration. While you can complete basic work with minimal equipment, quality tools produce professional results.
Must-have tools:
- Upholstery stapler or pneumatic stapler with various staple lengths.
- Heavy-duty sewing machine capable of handling leather and heavy fabrics (walking foot highly recommended).
- Hog ring pliers and assorted hog rings.
- Various upholstery needles, including curved needles for tight spaces.
- Utility knife with sharp blades.
- Scissors designed for thick materials.
- Seam ripper.
- Heat gun for shrinking vinyl and working with adhesive.
- Spray adhesive formulated for automotive applications.
- Measuring tape and straight edge.
Materials you’ll need:
- Upholstery fabric or leather in sufficient quantities (always order 10-15% extra).
- High-density foam in appropriate thicknesses.
- Foam adhesive
- Welt cord for piping.
- Matching thread for sewing.
- Backing material for door panels.
- Sound-deadening material.
- Carpet padding
- Trim adhesive
Optional but valuable tools:
- Commercial-grade steamer for smoothing wrinkles.
- Industrial sewing machine for the heaviest materials.
- Air compressor for pneumatic tools.
- Pattern-making materials.
- Paint sprayer for dashboard and trim work.
Many specific tools can be rented from auto parts stores or tool rental centers for one-time projects. For pricey items you won’t use frequently, such as industrial sewing machines or pneumatic staplers, this makes sense.
Common Mistakes to Avoid
Even experienced DIYers encounter pitfalls during the restoration of vintage car interiors. Learning from others’ mistakes saves time, money, and frustration.
- Rush the Disassembly Process: To prevent confusion during reassembly, carefully remove the original components, taking pictures and labelling each one.
- Skipping Rust Repair: Installing new upholstery over rusted floor pans is a waste; fix all rust first to ensure a solid foundation for lasting restoration.
- Using Incorrect Materials: Period-correct materials with the right grain, color, and texture are essential for an authentic vintage interior.
- Overtightening Upholstery: New materials should be snug but not overly tight, allowing for slight shrinkage to prevent premature tearing.
- Ignoring Pattern Grain and Nap: Upholstery has a grain, so cutting pieces consistently prevents shading issues and misalignment.
- Inadequate Pattern Marking: Confusion arises during assembly when pattern pieces are not marked clearly. Label each pattern piece with location, orientation, and grain direction arrows.
- Skipping Test Fitting: Test-fit patterns with muslin or scrap material first to catch fit issues before cutting costly fabrics.
How to Maintain Your Restored Interior
Protecting your investment requires ongoing maintenance. Proper care extends the life of restored materials and preserves that just-restored appearance.
Regular Cleaning Routine
Vacuum interior surfaces monthly to remove dust and debris that act as an abrasive on fabrics and leather. For leather, clean every three months with pH-neutral leather cleaner, then apply quality leather conditioner. This prevents drying and cracking.
Wipe vinyl surfaces with a damp microfiber cloth and vinyl protectant every month. Avoid silicone-based products that create buildup. Use products with UV inhibitors to prevent fading and cracking.
For cloth upholstery, spot-clean spills immediately and deep clean annually with appropriate foam cleaners. Never let moisture sit on original fabrics.
Protection Strategies
Use custom-fitted car covers when storing. Even indoor storage exposes interiors to dust and temperature fluctuations. Quality covers protect from environmental damage.
Install window tinting or use window shades to reduce UV exposure. Ultraviolet radiation is the primary cause of fading and material degradation in vehicle interiors.
Maintain climate control when possible. Extreme temperature swings accelerate material deterioration. If storing in unheated spaces, use desiccant packets to control moisture.
Consider protective seat covers for daily drivers. Many vintage car owners use period-appropriate seat covers to protect restored upholstery during regular use, removing them for shows.
Seasonal Considerations
Before winter storage, thoroughly clean all interior surfaces and apply protectants. Place moisture absorbers inside the vehicle to prevent mildew. Consider slightly opening windows if stored in dry conditions to allow air circulation.
In summer, use windscreen sunshades to reduce interior temperatures and UV exposure. Extremely high temperatures can cause adhesives to fail and materials to off-gas, creating odors and potential damage.
Professional vs. DIY Restoration
Deciding between professional restoration and DIY work depends on several factors, including your skill level, available time, budget, and the complexity of your specific project.
When to Consider Professional Restoration:
Professional restoration is recommended for complex sewing beyond basic skills, rare or high-value vehicles where mistakes are costly, tasks requiring special equipment, tight deadlines, or when concours-level results are desired.
When DIY Makes Sense:
DIY restoration is suitable if you have basic sewing skills and a willingness to learn, are working on a common model with readily available parts, and are comfortable with long-term, methodical projects. Budget constraints or the desire for personal involvement may also make DIY appealing.
Hybrid Approach:
Many restorations use a hybrid approach: DIY enthusiasts handle pattern making, disassembly, preparation, and installation, while outsourcing complex sewing or critical components to professionals. This approach balances cost savings with high-quality results.
Bringing Your Vintage Interior Back to Life
Vintage car interior restoration goes beyond repairing wear; it preserves automotive history and craftsmanship. Whether DIY or professional, success comes from using period-correct materials and planning for time and cost. The reward is an interior that looks, feels, and even smells like it did decades ago.
Ready to restore the interior of your vintage vehicle? Contact us today for a free consultation to discuss your vintage car interior restoration needs and discover how we can help preserve your automotive treasure for generations to come.
Frequently Asked Questions
How long does vintage car interior restoration typically take?
Professional shops typically complete full restorations in 4-12 weeks depending on workload and parts availability, with actual work requiring 80-150 hours spread across multiple tasks. DIY projects can take several months for first-timers as you learn techniques and work through complex components at your pace.
Can I restore my vintage car interior myself with no prior experience?
Yes, though starting with simpler projects like door panel restoration or carpet replacement builds essential skills before attempting complex seat reupholstery. Patience, attention to detail, and willingness to learn through online resources and upholstery classes are the most important qualities for successful DIY restoration.
What’s the most common mistake in vintage car interior restoration?
Using incorrect materials ranks as the most visible mistake, as modern generic automotive fabric immediately signals inauthentic restoration through wrong grain patterns, colors, or textures. Inadequate pattern work and skipping test fitting before cutting expensive final materials cause problems throughout the project regardless of installation quality.
How do I find the correct interior color for my vintage car?
Start with your vehicle’s trim tag or data plate, which often includes interior color codes that marque-specific forums can decode. Contact suppliers specializing in your vehicle brand, as they maintain extensive color-matching libraries and can match samples from even poor-condition original upholstery.
Should I restore my vintage interior to original specifications or modify it?
For show vehicles competing in concours events, originality is essential, as judges deduct points for modifications, and resale value suffers from departures from factory specifications. For daily drivers, thoughtful updates like modern sound deadening or upgraded foam density can improve functionality while maintaining a period-appropriate appearance.
What’s the difference between restoration and refurbishment?
Restoration aims to return the interior to original factory condition using period-correct materials and techniques, preserving historical accuracy. Refurbishment focuses on improving appearance and functionality without strict adherence to original specifications, often using more durable modern materials that achieve a similar look.
How much does professional vintage car interior restoration cost?
Basic seat reupholstery for common classic cars runs $1,500-$3,500, while complete interior restoration typically costs $5,000-$12,000 for common vehicles. Rare or exotic cars requiring concours-quality work may require $15,000-$30,000+ due to limited reproduction parts and specialized expertise.
Can water-damaged interiors be restored?
Yes, water-damaged interiors can often be restored, with surface damage cleaned or replaced at a reasonable cost. However, prolonged exposure that causes rust or destroys foam, backing, and carpeting usually requires a full restoration.
What tools are absolutely necessary for DIY vintage interior restoration?
Essential tools include a heavy-duty sewing machine, upholstery stapler, hog ring pliers, sharp scissors and utility knife, heat gun, and spray adhesive, enough to complete basic projects. Additional tools like industrial sewing machines, air compressors, and steamers help with complex work but can often be rented for single projects.
How do I prevent my restored interior from fading or cracking?
Prevention starts with quality materials containing UV inhibitors, followed by regular maintenance, including cleaning every few months and conditioning leather quarterly. Use window tinting or sunshades to reduce UV exposure, store vehicles with quality covers, and apply protectants containing UV inhibitors monthly for daily drivers.